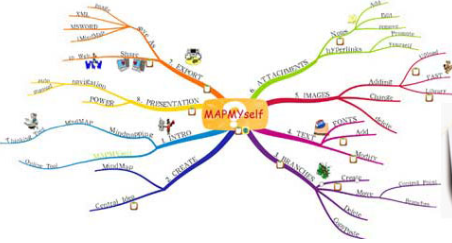
Thursday, June 21, 2012

MAPMYself Reviewed


1.   Name of the Tool
MAPMYself

2.   URL of the Tool
3.   Please select the one, primary category for this tool:
Critical Thinking/Problem Solving Tool

4.   Please describe this tool in your own words in about 150-250 words.

Mind maps are fairly new educational tools that are still under investigation.  Mind maps help the learner associate thoughts and concepts with graphical representations.  Mapmyself provides a free site for users to easily create mind maps for any topic. The user must first conceptualize a topic that he or she wants to illustrate with mind mapping.  There should be a central theme with several subcategories.  Each subcategory can also have branch points and there is the option to annotate notes for any branch point.  MAPMYself also allows the user to upload pictures or graphics to the mind map to enhance the visual representations associated with the concepts.
Like many other online tools, MAPMYself has a free and fee for service version.  The upgraded version allows unlimited mind mapping, uploading of pictures or videos from the user’s computer and exporting of the file to work documents.  The free version allows for two mind maps at a time to be published, utilization of the website’s images and exportation as an image.

5.   What do you need to know before using this tool?
The user needs to be able to first access and then navigate the internet.  A user needs to have a concept of what mind mapping is in order to appropriately utilize this website.  I quick referenced Wikipedia to develop a better overview of mind mapping.
6.   What do you need to have before using this tool?

The user must have a computer with internet connection.  The user should have an idea of what topic his or her mind map will encompass prior to trying to make the mind map.

7.   How do you use this tool?
1.   Go to website www.mapul.com

2.   Sign in to website with the screen shown below.


         3.   Create your mind map starting with this page.


4.   Use the url below for a short screencast on making a basic mind map.


8.   If applicable, please create an example with this tool             

Extubation Readiness Mind Map


9.   Please indicate what program you used for this task.
a.   Screenshots created by jing

b.   Screencasts created by screenr


10.        Please describe a scenario of how you might use this tool in a teaching environment.

I created my mind map about a topic that is taught to every new set of residents and fellows that start in the ICU.  One of the fundamental principles learned in the ICU is ventilator management and extubation readiness.  There are many evidence based articles in the literature for when to extubate adults but there are no strict criteria which can be applied to pediatrics and thus all avenues of extubation readiness but be explored.  The various components of extubation readiness must be thought about for each child preparing to extubate.  The mind map I created shows the most important criteria to explore for this patient care process.  It is a small reference that could be given to new rotators in the ICU.  This reference card could be used by the rotator to evaluate his or her patient prior to rounds so that his or her plan for the day can appropriately include whether the patient is ready for extubation.  This ability can help improve provider autonomy, feeling of responsibility for his or her patient as well as repeat thought process for this daily event in the ICU.

11.        What are the advantages of using this tool in a teaching environment?
This tool is free for the user.  It is fairly easy to use and is intuitive to create.  The final product is colorful and organized.  The mind maps can be used for a quick reference or for a more complex memorization assignment.

12.        What are the disadvantages of using this tool in a teaching environment?
The layout of the website is difficult to read and thus somewhat difficult to navigate to the pages the user needs to begin creating the mind map.  While I believe this tool can be used for a high complexity topic, much care must be taken to organize the mind map as it has an easy propensity to become cluttered and confused.   The free version is limited in that you can only have 2 mind maps on the web at once, you can’t upload images from the computer and you can’t export to word files.


Saturday, June 16, 2012

Scoop it reviewed


1.   Name of the Tool

2.   URL of the Tool

http://www.scoop.it/

3.   Please select the one, primary category for this tool:

Creativity Tool

4.   Please describe this tool in your own words in about 150-250 words.

Scoop it can be used by many genres of internet users.  It is a unique tool to create a central location for internet topics the users find interesting or useful.  Scoop it allows the user to “bookmark” internet sites that he or she will later want to refer to or review.  The website keeps these bookmarked items in a central location based on the user’s settings and creates a visually appealing webpage with the catalogued items.  A user may have several topics of interest he or she is tracking and thus can have several scoop it pages to keep his or her bookmarked information separate and organized. 

The scoop it page can be shared on social media sites such as facebook or twitter.  It can also be embedded directly into a blog.  The sharing capabilities of Scoop it are quite numerous.  This allows the user to create scoop it sites that can be used and shared with friends, co-workers or students.  The internet supplies a vast wealth of information and no one person can read everything however scoop it allows for a user to create an easily readable webpage that can transfer the salient items related to a topic to multiple other readers.  This task is accomplished by users having the option to “follow” other scoop it pages as well as search for topics that users are interested in.

5.   What do you need to know before using this tool?

A user needs to know how to navigate the internet to first find scoop it.  A user will also want to have an idea of the topics he or she will want to use scoop it to organize.

6.   What do you need to have before using this tool?

Computer, with internet connection

7.   How do you use this tool?

1.   Go to www.scoopit.com

2.   Sign up for free using this button

3.   You will have to then confirm your email to become fully registered.

4.   You will then be taken to the “curate” page where you will title your first scoop it page.  This “getting started” view is below.


5.   After you title your scoop it page, you will be directed to describe your scoop it page

6.   Then, you are ready to start collecting articles and information!

7.   After registration, you may install scoop it bookmarklet so that you may scoop articles while browsing the internet.

8.   You may also use scoop it’s recommended articles that are provided based on your scoop it page description.  The following image shows how scoop it displays suggested articles for the user.  The user may then remove source, discard or scoop the article.

9.   You may also write blog posts without linking it to a url.

10.Your dashboard when you have completed working on a page will appear as follows.  You can then make new pages and they will be listed on your dashboard.

8.   If applicable, please create an example with this tool and either embed in your blog or submit the URL.


9.   Please describe a scenario of how you might use this tool in a teaching environment

Scoop it could be used in a grammar or high school to keep track of current events. Many classes such as social studies and government studies use current events as a teaching tool in class to discuss topics that are currently being studied as part of the class curriculum or to keep abreast of up to date information.  The instructor can keep a scoop it page of topics he or she finds appropriate to the discussion of the class.  This provides control to the instructor of the topics that the students can report on.  The instructor can then ask the students to subscribe to the page to choose the article from the curated scoop it page that they wish to report on in class.  Currents events is a well-known teaching tool however scoop it allows this traditional teaching forum to be updated to use online technology tools while still maintaining the value of the conventional current events assignment.

10.       What are the advantages of using this tool in a teaching environment?

The registration process is easy and free on scoop it.  Beginning to curate a scoop it page is also quite easy and the webpage created is organized an appealing to the eye.

11.       What are the disadvantages of using this tool in a teaching environment?

While the website it easy to navigate, there is no “home page” that gives an overall synopsis of the purpose of scoop it and how to use it generally.  For users like me who happen upon scoop it, a general reference page would be helpful.  The FAQ link on the page is quite extensive however the user must have a specific question in mind prior to visiting this page.  I think the easiest use of scoop it would therefore be to users who already knew how the webpage operated.


Sunday, June 10, 2012

Communication Tool Review-Eyejot


1.   Name of the Tool


Eyejot


2.   URL of the Tool


3.   Please select the one, primary category for this tool:

Communication Tool

 
4.   Please describe this tool in your own words in about 250 words.

The premise of the website was to eliminate confusing contexts of the written text or email that are commonly encountered in both business and personal communication. It allows the user to create and send video messages without coordinating online time with the receiving parties.  The website states this is useful for personal connections involved with the military or in different time zones.  Businesses can use it for virtual communication of business plans, projects or proposals to be sent to employees or clients.

The tool is compatible with both PC and Mac computers as well as with iphone mobile devices and the ipad.  There is no current droid application however the website states this will be available in the future.  Eyejot does not require the user to download a program to their computers.  It is run from the internet, either on a mobile device or computer, which decreases security risks and concerns.


The tool has several tiers of use.  The free plan allows the user to record and send videos up to 5 minutes long. The user’s video inbox expires in 1 month and you cannot upload videos already on your computer or mobile device.  Pro upgraded plans range from 29.95 to 99.95 and allow the user up to 15 minute messages, no inbox expiration, the ability to upload video from computers, and the capability brand their videos with business logos.


5.   What do you need to know before using this tool? (What skills do you need to have?)


A user needs to be able to navigate the internet to the site first since it is not a program that the user can download.  The user then needs to be able to navigate the initial set up program and understand his/her audio and visual capabilities of their computer.  A user needs to understand the difference between using an embed code and a direct email of the file in order to save the video in their desired manner.

6.   What do you need to have before using this tool? (Resources)

Computer, with internet connection, microphone/video capabilities

7.   How do you use this tool? (Write the basic steps using a numbered list)


1.   Sign up on website

2.   Enable eyejot to use your microphone and camera

3.   Automatically taken to page to create first video message

4.   There is a record message button.  In this link, you can upload a save video or record a new video. 

5.   To start recording, click the button with the red dot. 

6.   You may then save the video to your computer, send directly to an email address or create an embed link.

7.   Over time, you will create a compilation of video in your sent box and as you receive video, in your inbox.


8.   If applicable, please create an example with this tool and either embed in your blog or submit the URL.


9.   Please describe a scenario of how you might use this tool in a teaching environment
I recently taught a class on pediatric respiratory distress that incorporated patient multimedia presentations to provide the learner with concrete examples of respiratory distress in children. The learners I was targeting have a paucity of pediatric experience and exposure and thus retention of the material is expected to be poor.  The learners were appreciative of the additional training and voiced wished to have more pediatric training.  After the class, I wanted to continue to provide educational materials for the learners even though the official class was complete.  Plausibly, I could only facilitate this with online training.  Intermittent electronic educational modules to help improve retention of the original material would be a model of spaced training for these learners.  Spaced training is proven retention model for adult learning.


Eyejot could potentially be used in spaced training projects that require multimedia applications.  Specifically for this project, the educator can create new and original video of live patients, with permission of their parents.  Since eyejot can be used on a mobile device, an educator is able to spontaneously capture new patient videos with appropriate clinical findings related to pediatric respiratory distress. This is important as respiratory distress is usually intervened upon quickly and thus the opportunity to capture it on video is fleeting.  These videos could be used in the spaced training to remind learners of the clinical features they should be able to recognize quickly in order to appropriately diagnose and subsequently treat respiratory distress in children. The video could be linked with an embed code so that the communication to the learner could also include a short set of questions.  The learner could be tested on findings in the video as well on recall of more specific facts regarding etiology, physiology and treatment of respiratory distress.  Ultimately, this could assist the learner in their retention of information between training sessions.

10.        What are the advantages of using this tool in a teaching environment?

This tool is free for the limited version which is always an advantage in education.  It can be used on macs and PCs which is convenient for the learner who is at home.  The tool does not require a download which is appropriate for shared educational computers which often have restrictions on downloading capabilities. The setup of the website with the computer is simple and easy for anyone who may not be software or hardware experts.

11.        What are the disadvantages of using this tool in a teaching environment?

A learner cannot upload already composed videos for free so this is not a good platform for the learner to share already completed work.  The inbox expiration at one month would also not support the tool’s use over a semester in a traditional learning environment as received messages would be lost after a month.  As I discovered while making my sample video, using a laptop to video anything other than yourself, takes an additional user to assist with the video or becomes quite difficult for a single user.  The mobile application would make this easier on a single user.